Start here
Choose Play, read Faceted Atrium and choose Start. The briefing requests one Any Gem and gives a five-move limit; the active board begins at 0/1 targets.
Read the controls, follow the real example and compare the result before trying your own run.
Play Prismatic →A ManyPlay browser walkthrough · Checked . Screenshots below show the actual game. Illustrated catalog covers are presentation artwork. Who publishes these games?
Verified opening-board solution
Choose Play, read Faceted Atrium and choose Start. The briefing requests one Any Gem and gives a five-move limit; the active board begins at 0/1 targets.
The source sits below the left mirror. A second mirror is one cell to its right, and the target gem is below that second mirror. Initially the left mirror sends the source beam out of the useful route.
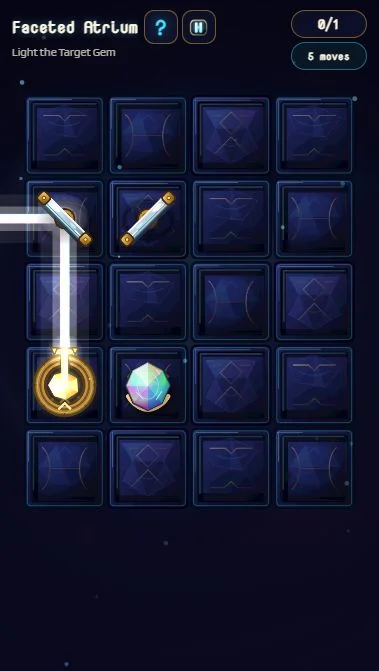
Rotate the mirror directly above the source so the upward beam turns right toward its neighbor. The allowance falls from 5 to 4; the target is still 0/1. Keep tracing instead of stopping at the changed beam.
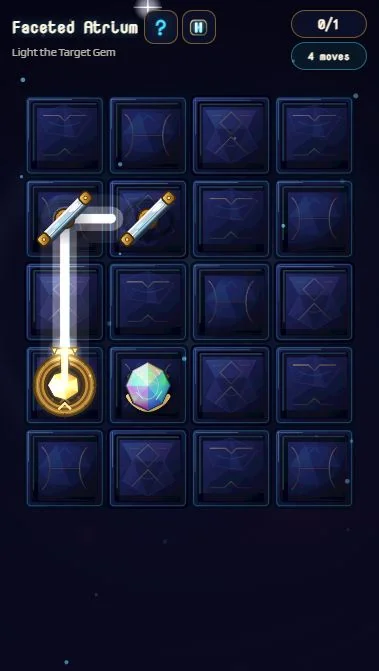
Rotate its right-hand neighbor so the incoming horizontal beam turns down toward the gem. The counter becomes 1/1 with 3 moves left. The result confirms Solved! — Moves: 2 · Par: 2 (Best!).
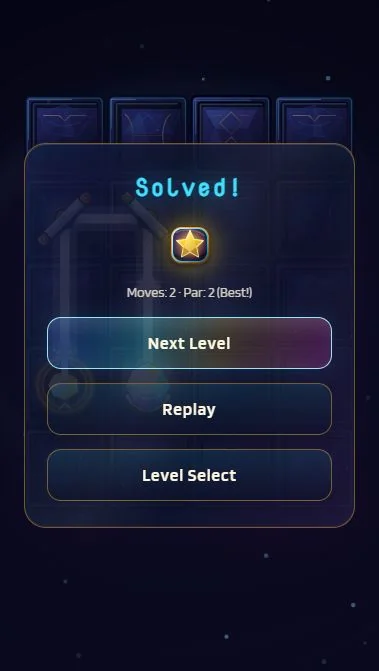
The two mirrors form a single continuous route: source → up → right → down → gem. Both rotations are needed. The first fixes the source branch, and the second supplies the destination. There is no color-mixing step on this particular Any Gem board.
It only redirects the source branch. The neighboring mirror still needs a turn to send that branch down to the gem.
No. The first briefing explicitly says Any Gem. Other targets can request a particular color; inspect each briefing before applying this example.
The menu offers Level Select and Daily Challenge. The broader game introduces optical and color-routing devices. Later boards need their own routes, and not every level asks you to mix colors.
Report a changed rule or control. Browser and Android editions can differ; the checked date describes this walkthrough, not a new game release.
Faceted Atrium is a small board, but it teaches two different checks: where the beam travels and whether the target condition is actually met. The first mirror can be correct while the board remains unfinished.
Begin with the source below the left mirror. Follow the beam in the direction it is already travelling instead of choosing a mirror merely because it is close to the gem. In the checked layout, the source sends light upward. Turning the mirror above it once redirects that light to the right, towards the neighbouring mirror.
That visible change is useful feedback. It establishes that the first part of the route now reaches another device. It does not establish a complete path to the target. If the target counter still says 0/1, locate the next break along the beam rather than undoing a correct upstream change by repeatedly turning the first mirror.
The gem is below the second mirror. Once you know where the light must arrive, ask what direction it needs on the final segment. A downward segment from that mirror can reach the gem. This gives the second rotation a reason: it changes the incoming horizontal beam into the required downward branch.
Combining the two checks produces one continuous route: up from the source, right from the first mirror, then down from the second mirror to the gem. The source-first view finds the available incoming light; the target-first view identifies the final outgoing direction. You can compare them before spending a move.
The briefing allows five moves. It is a limit for this board, not a request to perform five actions. After the first turn, four moves remain and the target stays 0/1. After the second, three moves remain and the target becomes 1/1. The result identifies two moves and Par 2.
This distinction matters when judging an experiment. A new beam segment, a lower allowance and a lit target are three different observations. Check all of them before calling a route solved. When comparing with the screenshots, use the board layout and counters together; a similar-looking light effect without the target result is not the same outcome.
The opening briefing requests one Any Gem. Its verified solution needs two mirror rotations and no colour-mixing step. There is no reason to search for a hidden prism action to finish this particular example.
Later briefings can request specific colours and introduce other devices. Read each target before applying an opening solution. A rule about reaching any gem cannot by itself explain a later colour requirement. The menu also lists Daily Challenge, but the shared daily seed and later-level solutions are not established by this two-mirror example.
Explanation checked 2026-10-28.